Unit 8: Sculpting The Human Skull
Unit 8: Where in the World? - Part 1
SCULPTING THE HUMAN SKULL
First of all, I feel that so far Unit 8 was the most important and the very best time during my studies at UAL.
We had some fundamental tasks, that gave me great knowledge of what I am already using.
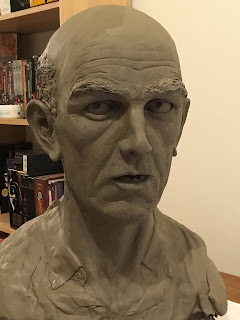
The first Project what We had to do is a half size human skull sculpture then later on we had to sculpt a portrait of a young woman.
Well, I was preparing myself for this unit for more than a year! When I was in the first year, I was always curious about what is exactly the second year about. When I saw that what are they doing, I knew that I am not on that level yet, so the only solution is to get there is starting to practice.
My favourite sculptors are (not in order, because I don't have one): Michalengalo, Philippe Faraut, Jordu Schell and John Humphreys. I spend my free time reading about them or just look up on the internet if I could find anything new about them. Jordan's and John`s work where deeply influenced me to start to learn about special effects and sculpting.
Altough due to the Covid-19 pandemic, we were studying from home, I was very excited when we actually started unit 8.
I could not belive it, but last year I had a chance to meet John Humpreys alongside Geraldine. He was teaching the secound year, but sometimes I had a chance to talk to him. On his last day at uni, he gave me some "home work to do": Sculpt the skull, mould it, cast it, then sculpt the face muscles. I had no option but to do this.
For these projects I have started to collect and make references and materials in the last year.
Some days before we started the project, I decided to do some sketching, as a warm up exercise.
We had one week to sculpt the skull, alongside online with Geraldine. She was teaching us to complete this project step by step. I think it was the first time when we had that amount of proper support to complete the project. It was a massive help, great guidance on what we needed to follow. I have felt a bit like, I am watching a cooking program on tv and I try to make dinner.
I decided to work with MonsterClay. I was lucky because I have got permission from Geraldine that I can use my own plastic skull as a reference. Everything started with measurements. I did some more drawings, made them like diagrams with the measurements.
Than I started to follow Geraldines online demo and started to sculpt the basic shapes.
Some useful technique from Phillippe Faraut.
I have tried to be as accurate as possible, so I kept measuring and copied the original plastic skull.
I really love vanilla Diet Coke
I was constantly playing with the Monsterclay, adding and moving and always measuring. At times, I was measuring the same spot again and again.
I wanted to make all the teeth look as realistic as possible.
I wanted to make realistic textures, so I have used the technic that we learnt from Geraldine when we had the prosthetic project.
The finished MonsterClay piece.
This was quite an intense week but the knowledge and understanding I've gained will be essential. I feel more confident to sculpt the next skull, moreover, this knowledge will be a big help in the future with head sculpting.
Sculpting with ZBrush
Our next project was to sculpt either a skull or the portrait head digitally with ZBrush. ZBrush is a digital sculpting program that combines modeling, texturing and painting. It uses a proprietary "pixol" technology which stores lighting, color, material, orientation, and depth information for the points making up all objects on the screen. The main difference between ZBrush and more traditional modeling packages is that it is more akin to traditional sculpting.
ZBrush is used for movies, games, and animations. ZBrush uses dynamic levels of resolution to allow sculptors to make global or local changes to their models.
Our teacher Jamie Rochford, was sculpting with us online, just like Geraldine before. Jamie was very helpful as well. He replied to my questions very quickly moreover he helped to choose what graphic tablet should I buy for ZBrush.
Altough Jamie was explaining everything, and the sessions were recorded, I just still could not use the program at all. I messaged him and I had to request a 1-2-1 session at the uni. He spent about 2 hours with me, we went through everything, and after that, I was able to actually start sculpting the skull.
Video of my final stage
This skull is still sketchy, I have to learn much more about ZBrush to reach the industry standards. This quality is the goal: 3d scan of my MonsterClay Skull
Moulding and Casting The Skull
Applying the first silicon layer.
Then we applied the secound layer of silicone.
We made the mould jacket from jasmonite. I never used this great material before, but it was a love for first sight.
We made the first cast from wax.
Casts of the skull: 1 wax and 3 jasmonite.
This mould making method was quite useful as well. I used the same method at home when I moulded and cast the portrait head.


Comments
Post a Comment